In houses of the old construction, the failure of the water supply system is a frequent occurrence. And the installation of an in-house pipeline made of modern materials or the acquisition of new plumbing fixtures does not solve the problem.
It helps only the complete replacement of the risers in the apartment. If you have already encountered a similar problem and do not know where to start, we will help you figure it out. The article will discuss what requirements should be observed when performing the replacement of risers, what steps the installation involves connecting the system and what materials will be needed for this.
Replacing the riser: legal aspect
The water riser is a vertical section of the pipeline, equipped at the base with a shut-off valve. It is a common property.
Therefore, its replacement should be carried out by the managing organization (housing department or housing office) without additional payment from the employer or owner.
Image Gallery
Photo from
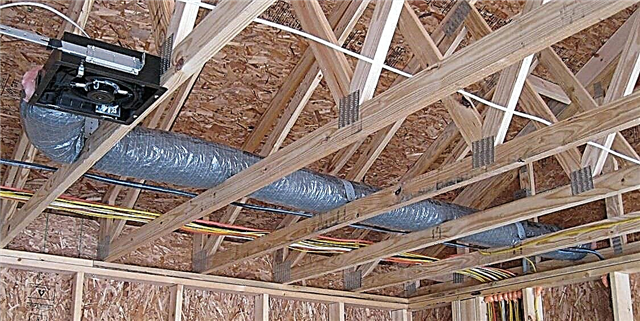
Connecting the collector to the water riser
Combined assembly scheme
Risers in old apartments
Risers in the inspection hatch
Open pipe wiring
Cold water riser insulation
Collector circuit device
Bringing polymer pipes to risers
The owner of the apartment only needs to write a statement addressed to the manager of the HOA, indicating in it the problem that needs to be solved. The exception is only if the house is not the property of the housing department. In this situation, the repair of common property is carried out at the expense of the residents.
Among the common property is everything that is located on the site from the riser to the first stop valve. If the locking device is not provided before the mixer itself, then this section inclusively belongs to the number of common property.

The risers are equipped with taps, with which they increase or completely shut off the water supply; they are replaced with the replacement of the pipeline
If the owner of the apartment plans to carry out major repairs and at the same time make a hidden laying of the pipeline, or he decided to relocate the riser to a new place in connection with the redevelopment - all work will be done at his expense.
Any redevelopment associated with the use of house property, including apartment risers, must be agreed with the management organizations. Only by handing in hand the appropriate written permission can he invite the installers of the managing organization or private company to carry out the work.

For their own money, the tenant or the owner of the apartment must repair and replace only what is located after the shut-off valve.
Reasons to install a new riser
The need to replace a vertical pipeline arises in two cases: after the expiration date of the metal structure and when performing a complete repair of the bathroom.
Depending on the conditions, its replacement is performed in one of two modes:
- planned - with deterioration of water pipes;
- emergency - in case of malfunction and leakage.
In the houses of the old construction, “native” apartment risers are made of galvanized or cast-iron pipes. Metal structures are subject to corrosion, and therefore require replacement.

Corrosion is the main enemy of cast iron and steel pipelines; it “corrodes” faster corrodes risers with hot water supply than with cold
It is noticed that the pipes wear out most in the interfloor ceilings. Therefore, the connection of the new pipe with the old one should be done outside the ceiling: in the bathroom of the neighbors living on the floor below or above.
For metal pipes, the service life is about a quarter of a century. In reality, they last much longer. But after forty years of service, they are in disrepair.

The use of metal pipes after the warranty period is not recommended for the reason that they can break through at the most unexpected moment.
Even if the pipes look whole after the end of the operating period, it is recommended that they be replaced anyway. This is due to the fact that a pipe worn out over time can burst at any time, which will lead to great material damage both to the owners of the apartment and to the neighbors who have suffered from flooding.
In the planned mode, it is recommended to replace the pipes at the stage of overhaul. When arranging modern interiors, it is customary to “hide” the pipeline into the wall, and therefore it will not be easy to get to it in the event of an emergency.

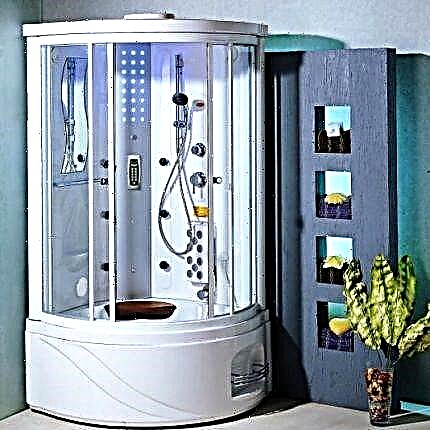
If you dream of installing a new jacuzzi or acquiring auxiliary equipment for a bathroom, then transferring a vertical pipeline cannot be avoided
Cast iron pipes, as a rule, are replaced by polypropylene analogues. And such a choice is fully justified by a number of undeniable advantages that the polymer has.
These include:
- resistance to corrosion and aggressive influences;
- the smoothness of the inner walls, preventing the accumulation of limescale on the inner surface of the pipeline;
- high strength;
- environmental Safety.
Conventional metal-plastic and polypropylene pipes of the appropriate diameter are suitable for arranging a cold water pipeline, and pipes designed for heating systems are suitable for supplying hot water. They are distinguished by higher strength and increased resistance to deformation.
Manufacturers of polypropylene pipes claim that the service life of the products is about 50 years, and those used to supply cold water are around 100 years.

The inner surface of the polypropylene pipes in contact with drinking water meets all sanitary standards, and the inner diameter of the products does not change during operation
Compared to metal structures, installing polypropylene pipes takes much less time. The use of welding technology allows with minimal effort to obtain a strong and reliable connection.
Water riser replacement technology
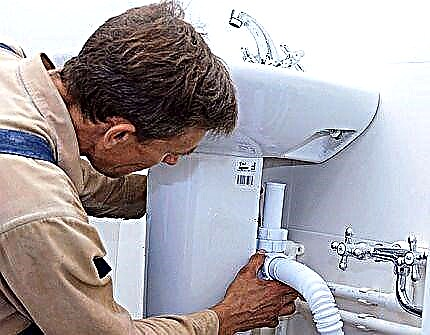
The risers are located in the bathrooms, placing them at a slight distance from the wall. The riser is necessarily equipped with a shut-off valve, with the help of which the water supply to the apartment is shut off.
Ideally, you need to change the entire span. But in practice this does not always work. In extreme cases, the floor-to-ceiling section should be replaced. In this case, it is unacceptable to update only a short piece of pipe exposed to rust.

One riser accounts for a whole group of water intake devices, including a washbasin with a bath or shower, a toilet and a bidet
If the replacement of the riser occurs in an apartment building, the neighbors should be warned in advance about the time for repair work. With neighbors living in apartments located directly above your top and bottom, you should agree on the possibility of performing work on their territory. After all, new pipes will pass through the floors.
If consent cannot be obtained, pipe connections will have to be performed within your bathroom: above the floor and under the ceiling. In this case, it is mandatory to provide access to those places where the pipes will be docked, so that if a leak occurs, it can be quickly eliminated.
Image Gallery
Photo from
Features of partial replacement of risers
Replacing damaged pipe sections
Gas cutting problem areas
Welding a new segment to the riser
Pipe specificity for pipe installation
Riser insulation device
Installation of metering devices
Stage # 1 - material selection
Having settled all the issues with the neighbors and the managing organization, we can begin to draw up a scheme. Its preparation will allow you to determine the wiring of the bathroom pipeline and calculate the amount of consumables.
To carry out the work, it is necessary to prepare:
- polypropylene pipes D110mm;
- fittings of the appropriate diameter;
- metal clamps;
- silicone sealant.
Pipes for mounting a vertical pipeline should choose a diameter that is equal to the cross-sectional size of the dismantled elements.
To connect the sections of the riser to be replaced with the adjacent ones, use D110mm couplings and compensators. To connect a plastic pipe with a steel one uses adapter cuffs.
Image Gallery
Photo from
Pipes of old plumbing
Replacing a steel riser with metal-plastic
The execution of risers water supply polymer pipe
Copper pipes in a communications device
At the same time, the finish finish of the riser is thought out: the need for noise and heat insulation, the construction and design of the box.
Of the tools required:
- Bulgarian;
- 3-4 cutting discs D125mm;
- thread-cutting tool;
- adjustable wrench and gas wrench;
- building level;
- a simple pencil;
- screwdriwer set;
- chisel;
- a hammer;
- roulette;
- scrap (for use as a lever).
It is necessary to prepare protective equipment in advance: a hat, a respirator, goggles and heat-protective gloves.

In case of displacement or alignment of the vertical pipeline, a pair of pieces of plastic bends with an angle of 45 ° C having a diameter of 100 mm are additionally purchased
To weld polypropylene pipes, you must purchase or rent a soldering iron equipped with Teflon nozzles of different sizes.
Carrying out the replacement of the riser utilities are appointed on weekdays in the time interval from 10 to 15 hours, when many residents are at work. This minimizes the inconvenience of limiting system operation.
Disabling the existing pipeline is carried out with the involvement of specialists, but not by itself. On average, 30 to 60 minutes are spent on repair work. But, in order not to miss important details, do not rush too much.

The use of a pipe cutter, a tool equipped with cutting rollers or rollers, will help to simplify the process of dismantling cast-iron pipes, helping to obtain an even cut with smooth edges at the cut points
Stage # 2 - dismantling old pipes
The dismantling of a vertical pipeline made of a water-gas steel pipe is among the plumbing works of increased complexity. For their implementation, you must have sufficient experience working with an electric tool and strict adherence to safety regulations.

It is important to understand that the quality of installation of a new pipeline largely depends on how correctly the old one was dismantled.
First of all, they shut off the system and release water from it. This work should be performed by a representative of the public service. Break the rule is not worth it - otherwise get an administrative penalty.
Using a grinder or armed with a pipe cutter, old pipes are cut. To do this, at a distance of 10-15 cm, two horizontal cuts are made, converging to the edge of the pipe located against the wall. To prevent the upper part of the pipe from sagging, it is better not to do the cuts first.

To separate and remove the cut ring, you can drive wedges on the sides of the horizontal incisions, or you can make vertical incisions
The upper piece of pipe is cut to a design height equal to the length of the shaped part, which will be pressed during installation. The task of the master is to make the notch plane perpendicular to the axis of the pipe itself.
To simplify this task, a masking tape strip is used as a guide. It is glued around the circumference so that the end is precisely superimposed on the beginning.
To remove the lower section of the riser, the pipe is carefully loosened, being careful not to damage the bell. The solution at the junction is hollowed out around the perimeter. Cut pieces of pipe are removed using a wedge or crowbar.
In the old days, cast iron pipe joints were carried out in one of two ways:
- by minting seams with cement-sand mortar;
- by filling the junction with gray.
To remove the hardened cement mortar, the upper layer of the seam is cracked with a screwdriver. The easiest way to burn sulfur is to heat the elements of the pipeline with a blowtorch. To adjust the draft in the riser, a metal or asbestos-cement shield is laid on top of the pipe. After heating the structure, it is not difficult to disassemble the joints.
The cut elements with a screwdriver are gently pulled from the floor slabs, the stuck pieces are knocked out with a hammer. On the cleaned area mark the places for placing the clips necessary for fixing the pipes in the wall at the points of the wiring.
Stage # 3 - installing a new pipeline
With the help of a hacksaw for metal or scissors for polypropylene, new pipes are cut into elements of the required length. On the connected sections of the elements make notes indicating to which point the connection will be made.
If the neighbors still have metal risers, it is necessary to assess the state of the metal structure, determining whether it is possible to perform threading at its end. To simplify the cutting procedure, the end of the pipe is lubricated with machine oil.

The pipe section along the entire perimeter is trimmed and the conical bevel is removed using a grinder equipped with a grinding disc
If a metal pipe does not inspire confidence and there are suspicions that it may burst at the time of loading when threading, it is worthwhile to do it easier by welding a finished thread of 5-7 turns, or by making a connection using a collet coupling.
It will already be possible to connect a threaded adapter to it for mounting a plastic pipeline.
Dock metal with plastic through a threaded connection using a sleeve. Tightening during installation should take place with a small gain. To achieve this effect, the joints are sealed with linen winding and coated with investment paste. Before putting the adapter on the cast-iron pipe, the joints should be sealed.
Joining plastic elements is much easier. Spike sites are cleaned and treated with an alcohol compound.

The welding of polypropylene elements is carried out using a welding iron equipped with a Teflon nozzle; heating temperature should leave about 250 ° C
At the same time, the fitting and the end of the pipe are put on a heated device. Both elements are screwed to the entire depth of the nozzles. After waiting for the elements to warm up, both workpieces are carefully removed from the nozzle and connected to each other.
Features of connecting to the wiring
In the place where the vertical pipeline will be connected to the wiring in the apartment, a 32/20/32 tee is installed. To facilitate the installation of the tee, its end is lubricated with liquid soap. Elements are fixed by soldering.

When planning to install a heated towel rail in the bathroom, two additional tees are being installed on the pipeline
An important point: when installing tees, it is preferable not to have a sleeve, but a soldered connection.
By installing a shut-off valve, check for leaks. If there is none, fix the assembled structure to the wall.
To do this, using a building level in the wall, preliminary points are made for making holes for installing clips. Fasteners are placed every 100-150 cm.
From the moment of the last connection, it is possible to fill the installed network section with water no earlier than in an hour.To ensure a sufficient level of moisture resistance and sound absorption, the places where pipes pass through the floors are concreted throughout the thickness. These and other finishing measures are carried out only after design testing.
The sequence of actions when replacing a steel pipeline with polypropylene:
How to digest risers:
There is nothing complicated in replacing the apartment riser for water supply. The main thing is to get permission in the Housing Office and obtain the consent of the neighbors about the implementation of the tie-in. Observing the installation technology and using high-quality material in your work, you will be able to build a system on your own that will last more than a dozen years.
If you have any questions when familiarizing yourself with the information, or if you have experience replacing the risers and want to share it with our readers, please leave your comments in the box below.